


Advanced Color Correction & White Balance in Photoshop CC
Salepage : Advanced Color Correction & White Balance in Photoshop CC
Archive : Advanced Color Correction & White Balance in Photoshop CC Digital Download
Delivery : Digital Download Immediately
There is a great way to correct dull photos in Photoshop using levels and the eyedroppers. This works really well for photos that are lacking in contrast or have a color cast. This rings true for scans from film, shooting in haze or fog and also works well when shooting a back lit object that get softening of contrast because of lens flaring.
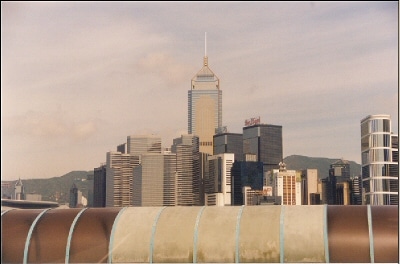 This photo is an image that I snapped during a trip to the amazing city of Hong Kong. As you can see, the image is lacking a bit of contrast and also has a slight color cast to it.
It’s really not that bad (or is it?), but just looks somewhat dirty. You will soon see a huge difference in image quality.
CALIBRATING YOUR EYE DROPPERS
Before we make any adjustments, we need to set some defaults in the eyedropper tool to prevent the photos from looking too dark and to bright.
We are now going to set the black and white points in the levels settings.
Add a levels Adjustment layer
In the Levels dialog box double click the Set Black Point tool as shown at left.
More from Categories : Photography


Reviews
There are no reviews yet.